I’ve been wanting to write this post for a while, but I’ve hesitated because I thought that it would only benefit the few of us with high end cameras. But when I finally got my Sanyo VPC-WH1, which is the video version of a point and shoot, I realized how important these concepts are, even on that end of the spectrum.
Like anything, understanding how photography works will make you better at it. This guide is intended for people without photography backgrounds who want to understand how to get the most out of their cameras.
Megapixels Don’t Really Matter
The first thing to understand is that megapixels don’t really matter. Megapixels are a unit to measure resolution. Multiply the height and width of a picture, and you have the number of total pixels generated. Divide that by a million, and you have the megapixels.
For example, an average computer screen is 1280×768 pixels. Multiply those numbers and you get 972800, or just under one megapixel. That means that to generate a full screen picture, you could use a camera that is less than one megapixel.
The two cases where higher megapixels come into play are cropping and printing. A screen is typically 72-150 dots per inch (dpi). A photo typically prints at 300 dpi, which means that for a 4×6″ photo you need at least 2 megapixels (4 x 300 x 6 x 300 = 2160000 or 2.16 MP).
Most people print out so few of their photos that a one megapixel final image is probably good enough. More important is cropping. If you have a four megapixel camera, then you can crop out 75% of your photo and still have enough pixels to fill a screen.
You also get diminishing returns as you move up the megapixel ladder. The bigger the image size, the more pixels it takes to add an extra row on all sides. It’s like a puddle: at first when you pour water in it it will get bigger quickly, but once it gets big the edges of it will expand very slowly.
A 6 megapixel image is 3000×2008 pixels. A 12 megapixel image is 4000×3000. Twice the megapixels, but not a huge jump in final image size.
Still, more megapixels is better than fewer, right? Not necessarily. As you’ll soon understand, what matters most is how much light is captured by the sensor. In between each pixel is a small frame. The more pixels you have the more total frame area you have, which means that a lower percentage of the light actually gets captured. A 2 megapixel camera may actually capture MORE light than a 12 megapixel camera.
The other downside is that more megapixels means bigger file sizes. A memory card can hold twice as many 6mp images than 12mp images, and 12mp images will take up twice as much hard drive space.
So how many megapixels is really enough? I’d say six to eight. That’s enough print out 8×10 images and to crop aggressively for on-screen viewing. Of course, many high end cameras have much higher megapixel counts. That’s fine too, but make sure that you’re buying a camera for its other merits, not its megapixel count.
It’s All About The Light
A camera, in its simplest definition, is a light capturing device. Light comes through the lens, is admitted into the camera by the shutter, and is absorbed by the sensor. These three elements each have one primary adjustment that you can make. The tricky part is that each adjustment you make affects your decisions for the other elements.
There’s a certain zen quality to it, though. Each step you move one element will either halve or double the amount of light captured. That’s the quantitative effect on the photo. At the same time, each adjustment also has a qualitative effect on the photo. The trick to photography is to balance those effects to produce the image you want.
Aperture
The aperture is the round hole behind the lens which lets light in. It’s made out of adjustable blades, usually arranged in a polygonal pattern (which is why light blurs show up as hexagons or octogons sometimes). On some cameras, like mine, you can easily see the blades opening and closing. When it’s very small the aperture is just a tiny dot. When it’s all the way open you can’t see the edges because it fills the whole lens.
The size of the aperture is expressed in f-stops. You’ve seen people talk about f/2.8 or f/16 before. They’re talking about aperture.
Because it’s a fraction, f stops with larger numbers are much smaller. So a wide open aperture might be f/1.2, an aperture that barely lets any light in at all would be f/16. You’ll also hear people referring to these as “fast” and “slow” because an f/1.2 lets in light a lot faster than an f/16.
The numbers are standardized to indicate settings that double or halve the amount of light coming in to the camera. For example, f/5.6 lets in twice as much light as f/4 and half as much as f/8.
The amount of ambient light is going to be the primary determinant of your aperture size. If it’s a bright sunny day, anything below, say, 5.6, might result in a washed out image even with the most conservative settings on your other controls. At night you’ll almost always want your aperture to be as wide open as possible.
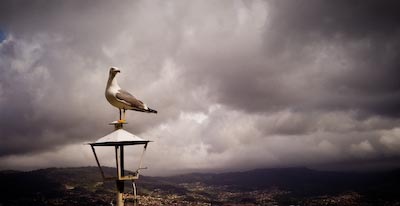
Besides being the first line of defense when letting light in, your aperture setting also controls the “depth of field” or “bokeh” of your image. These terms refer to that blurring of the background that makes your subject really stand out.
A shallow depth of field, achieved with a large, wide open, aperture, will make it so that only a small slice of your subject is in focus.
When shooting portraits, you generally want as shallow a depth of field as possible, so that the face is in focus but everything else is blurred and doesn’t distract. When shooting a person in front of a landscape, however, you might want to keep everything in focus and thus set the aperture as high as possible.
Because the depth of field affects the resulting image so drastically, your primary concern is usually to get the aperture to a certain point, and then adjusting your other settings to make it work.

(f/1.4)
Shutter Speed
Shutter speed is expressed in fractions of a second, like 1/125 or 1/2000. This number represents the amount of time that the shutter stays open, allowing light to flood through the lens onto the sensor.
If you want to use a large aperture in the sun, you may set the shutter speed for something tiny, like 1/2000. If you’re taking a shot at dusk it might be more like 1/8.
The longer the shutter is open, the more blur you’ll get. Depth of field creates a desirable blur, leaving your subject in focus, whereas long shutter times generally create an ugly blur, leaving your whole photo blurry (there are artistic exceptions, which I won’t get into).
Without a tripod it’s difficult to hold a camera still enough beyond around 1/8 or 1/15 of a second.
If your subjects are moving, you probably want a faster shutter speed. For example, a lot happens on a basketball court in 1/8 of a second. Take a picture of a basketball game at that speed, and everyone will be motion blurred.
(1/2000 shutter speed)
If you’re taking a picture of a waterfall, on the other hand, you might WANT that motion blur, because it will make that dreamy flowing effect you’ve seen before.
You can probably already see the interplay between aperture and shutter speed. If you want to take a picture with a large aperture, you’ll need a faster shutter speed. If you want to take a picture with a small aperture, you’ll need a longer shutter speed. Each adjustment you make on one setting will affect the range of choices you have for other settings.
Sensor Sensitivity (ISO)
The last thing you can adjust is the sensitivity of the sensor. This is expressed as an ISO number, like 50, 100, 200, 400, 800, 1600 or beyond.
Think of this as the gain on an amplifier. The higher you turn it up the louder the music is, but the more distorted it is. On a camera a high sensitivity means that less light is needed for a bright picture, but more noise and grain is introduced. The amount of noise varies by camera. Mine is noise free at 200 and 400, slightly noisy at 800, and distracting at 1600.
During the day you almost always want your camera set for the lowest sensitivity possible. Once it starts to get dark you have to evaluate the tradeoff. You may be able to take a picture at 400 ISO with a 1/8 second shutter speed, or a 800 ISO with a 1/4 second shutter speed. What’s worse? Motion blur because it’s hard to hold a camera still for 1/4 of a second, or a bit of grain?
(1600 ISO and f/1.4 with only moonlight)
Black and white noise isn’t as bad as color noise, so if you plan on converting your photos to black and white, you may be willing to shoot at a higher ISO.
Putting it All Together
Most cameras will adjust all or most of these settings for you. Mine does auto exposure, but the sensitivity and aperture must be set manually. That means that I’ve become intimately familiar with all combinations. Here are some examples of combinations you might use for different settings:
| Setting | Aperture | Shutter Speed | ISO |
| Tennis match during the day | any | fast | low |
| Midnight shot of the stars | full open | very slow | med |
| Daylight portrait | full open | any | low |
| Landscape with barn in front | closed | any | any |
Here’s why:
For the tennis match, the most critical aspect is the shutter speed. Tennis players move quickly, so you want the exposure time to be as quick as possible. I’d set the ISO low so that I don’t get any noise, maybe 200 or 400, and then would adjust the aperture to get a good exposure. If I really wanted both players in focus I would have to have the aperture closed more, which means I might need to bump up my sensitivity and slow down my shutter speed a bit. Settings I might end up on: f/8 1/2000 and ISO 400.
To capture the stars I want to do the opposite, leaving the shutter open as long as possible. Once you get past a certain point in your focus range, you are “infinity focused”, meaning that everything past a certain distance will be in focus. On my camera that’s somewhere around 30 feet. Keeping the shutter open wide allows the most light in possible, and won’t blur anything because the stars are the only thing in my field of view. Settings I might end up on: f/1.4, 4 seconds, ISO 800 or even 1600.
For a daylight portrait I want the Aperture open, not to capture the most light, but to provide a blurry background. I want the ISO low to counter the wide aperture and to avoid noise on my subject. Finding the correct shutter speed would just be a matter of letting in the right amount of light for the other two settings. Settings I might end up on: f/1.4 1/125 seconds, ISO 200.
For the barn, my most important decision is to have the aperture as closed as possible. I want the barn and the background to both be in focus. If it’s really dark I may not be able to close it all the way to f/16, but in the middle of the day I could. The other settings will be decided based on the available light. Settings I might end up on: f/16, 1/30 seconds, ISO 200.
These settings aren’t set in stone, of course. Doubling the ISO and halving the exposure time would work in most of the cases. Slightly different lighting conditions call for different settings.
There’s no point in trying to memorize these values. The best thing you can do is understand how these three settings (and their host mechanisms, the lens, shutter, and sensor) work, and the visual effect each one controls along with light flow.
You can probably now understand why manual mode isn’t that great. It can adjust for the proper amount of light, but it can’t ever know if you want the background in focus, if your subject is moving or not, or how much grain you’re willing to accept.
(by the way, all of these examples are assuming you don’t use your flash, Unless you have a high quality external flash and know how to use it, your photos will probably be much better without it.)
Leave a Reply